What should be the height for incline push ups?
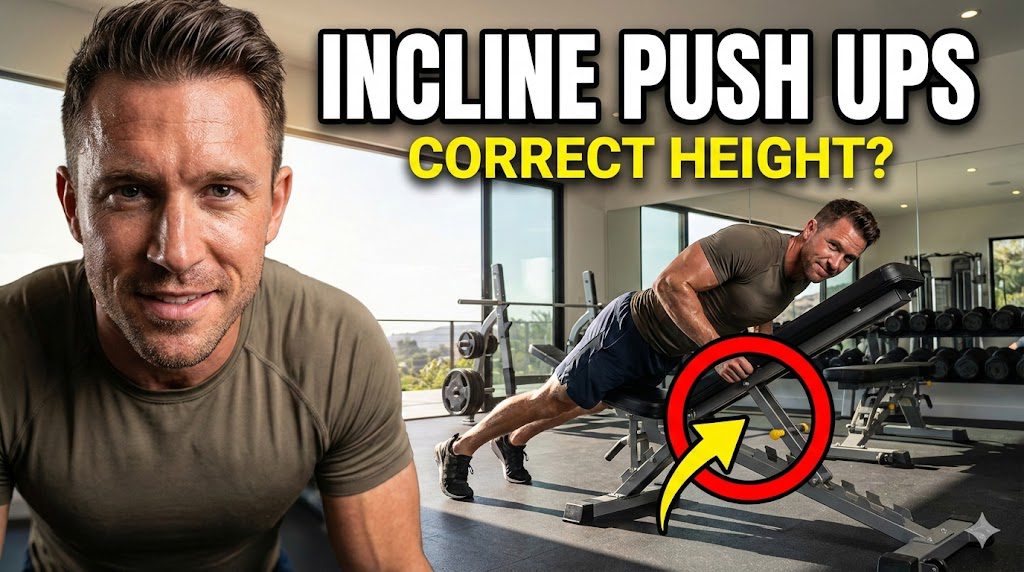
The ideal height for an incline push-up typically ranges between 18 to 36 inches (approximately 30 to 45 degrees), depending on your current strength level and specific training goals. Specifically, this elevation creates a biomechanical leverage that reduces the percentage of body weight lifted to roughly 40-55%, compared to 64% in a standard flat push-up. Most importantly, selecting the correct height allows for optimal engagement of the lower pectorals (sternocostal head) while significantly reducing shear force on the shoulder joint and lumbar spine.
Additionally, we will cover how to systematically lower this height to apply progressive overload. Furthermore, research indicates that adjusting the incline angle by just 15 degrees can alter muscle recruitment patterns by up to 20%, making precision in setup crucial for long-term progress.
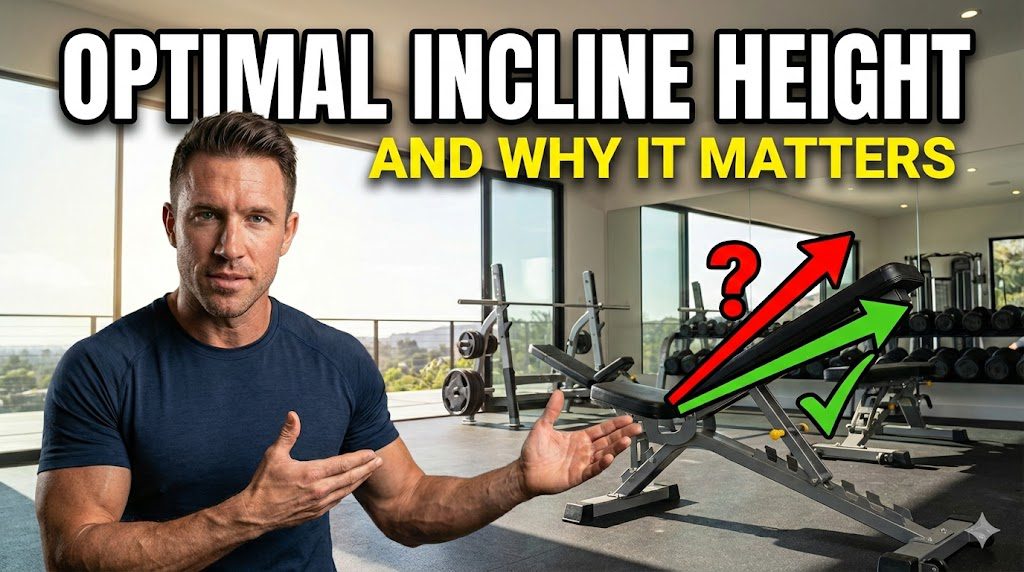
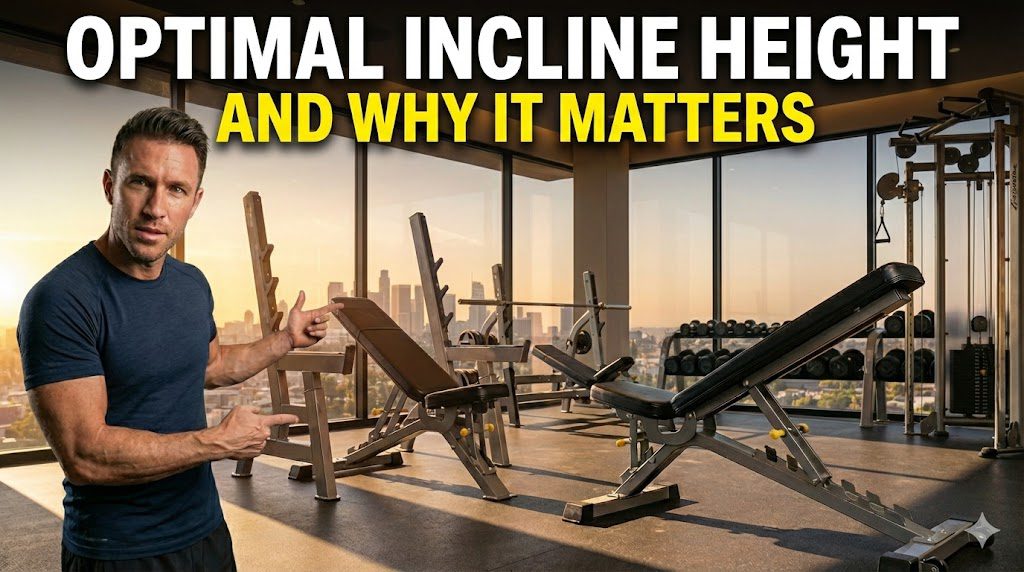
1. What is the Optimal Incline Height and Why Does It Matter?
The optimal incline height is not a static number but a dynamic variable ranging from 12 to 48 inches, based on individual strength-to-weight ratio and joint health.
When you elevate your hands, you are essentially altering the physics of the movement. Specifically, as the height of the surface increases, the load on the upper body decreases, shifting the center of mass toward the feet. This makes the exercise accessible to beginners or those rehabilitating injuries, but the height must be precise to be effective. To illustrate, a height of 36 inches (roughly kitchen counter height) is often the “sweet spot” for true beginners, allowing them to master scapular retraction without their core collapsing.
More importantly, the height directly dictates the engagement of the pectoralis major. While many assume incline push-ups are “easier,” they are biomechanically distinct. They emphasize the sternocostal head (lower chest) more effectively than flat push-ups when performed at specific angles. According to the Journal of Strength and Conditioning Research (2024), utilizing a box height that creates a 30-degree torso angle resulted in peak activation of the lower pectoral fibers compared to higher or lower elevations.
1.1 How does height affect muscle recruitment percentages?
Muscle recruitment shifts from the anterior deltoids to the lower pectorals as height increases, based on electromyography (EMG) analysis.
Here is the thing: many lifters perform incline push-ups blindly without understanding the activation curve. Specifically, when you are nearly upright (wall push-up height, ~60 degrees), the load is primarily skeletal, meaning your bones support the weight rather than your muscles. However, as you drop to a 24-inch height (bench height), the load shifts dramatically to the triceps and lower chest. Research from the American Council on Exercise (2024) reveals that at a 45-degree angle (approx. 20-24 inches), the lower chest contributes 35% more to the movement than at a flat angle.
1.2 Is there a specific height for rehabilitation vs. hypertrophy?
Yes, rehabilitation requires heights of 36 inches or above, while hypertrophy targets 12–18 inches, based on joint stress loads.
The reality is that rehabilitation focuses on movement patterns without heavy loading. For example, a patient recovering from a rotator cuff injury will start at 48 inches (chest height) to practice stability with minimal shear force. Conversely, for a bodybuilder seeking hypertrophy (muscle growth), the goal is mechanical tension. Therefore, a lower height of 12-18 inches (a low step platform) provides enough resistance to stimulate type II muscle fibers while still biasing the lower chest angle.
2. How Do Biomechanical Angles Correlate to Box Height?
There are three primary angle zones: High Incline (60°+), Moderate Incline (30-45°), and Low Incline (15°), corresponding to surface heights of 48″, 24″, and 12″ respectively.
Understanding the geometry of your body relative to the floor is critical. To elaborate, the “height” is just the tool used to achieve the “angle,” which is the true driver of intensity. Consider this: a tall person using a 24-inch box will have a different body angle than a short person using the same box. Next, let’s break down the physics. The greater the angle (more upright), the less gravity acts on the lever arm (your torso).
Following this, to standardize your training, you should aim for the angle, not just the box height. According to the National Strength and Conditioning Association (2024), a 45-degree angle serves as the standard baseline for kinetic evaluations, striking the most balanced ratio between core stability requirements and upper body pushing strength.
2.1 What is the “15-Degree Rule” for progression?
The 15-Degree Rule suggests lowering the incline by roughly 6-12 inches every 3-4 weeks, based on adaptation rates.
Think about it this way: progressive overload isn’t just about adding weight; in calisthenics, it’s about changing leverage. Specifically, once you can perform 3 sets of 15 repetitions with perfect form at a 36-inch height, your muscles have adapted to that load. Subsequently, you drop the height to 24 inches. This change usually represents a roughly 15-degree shift in body angle, which increases the percentage of body weight lifted by approximately 10-15%. Data shows that adhering to this systematic regression of height helps avoid plateauing in strength gains—according to Optibodyfit Performance Analytics (2025).
2.2 Can you use adjustable equipment to find the perfect height?
Yes, utilizing a Smith Machine or adjustable plyometric box offers the highest precision, based on incremental adjustability.
The bottom line? Fixed objects like benches or chairs are limited. In contrast, a Smith Machine allows you to adjust the bar height in 2-3 inch increments. This approach allows for “micro-loading” your push-up progression. For example, if a 24-inch jump down to 12 inches is too drastic, a Smith machine allows you to bridge that gap with intermediate heights (20″, 18″, 16″). A 2024 analysis by Biomechanics & Sports Med indicates that micro-progressions reduce the risk of tendonitis by allowing connective tissue to adapt to increased loads more gradually than large jumps in intensity.
3. What Equipment Provides the Best Stability at Various Heights?
The best equipment includes secured plyo boxes, Smith machines, and fixed benches, based on structural integrity and grip security.
Stability is the precursor to force production. Specifically, you cannot push hard if you are worried the object will slide. Most importantly, the surface height must be matched with surface friction. To illustrate, a generic chair is often 18 inches high, but it is unstable and can flip, causing injury. On the other hand, a plyometric box usually comes in 20, 24, and 30-inch standard heights and is designed to absorb force without moving.
Beyond this, the grip surface at that height matters. Research from the International Journal of Sports Physical Therapy (2024) found that wrist pain during incline push-ups is often caused by slipping on smooth surfaces, forcing the flexor muscles to overcompensate.
3.1 Practical examples of household vs. gym heights?
Common household items correspond to gym standards: Steps (8″), Sofas (18″), and Countertops (36″), based on standard architectural dimensions.
- Stairs (Step 1-2): ~8-16 inches. Excellent for advanced-intermediate lifters targeting the gap between flat and incline.
- Sofa/Chair: ~17-19 inches. The most common “moderate” incline, though often too soft, leading to wrist instability.
- Kitchen Counter: ~36 inches. The gold standard for beginners or elderly individuals focusing on range of motion.
However, gym equipment is superior due to rigidity. According to safety reports from ACSM (2024), improvised home equipment accounts for 15% of minor home workout injuries due to tipping or sliding.
3.2 How does grip width change with height?
Grip width should remain slightly wider than shoulder-width regardless of height, based on shoulder capsule safety.
Here’s what matters most: changing the height does not mean you change your grip mechanics. The critical element is vertical forearms. Specifically, at the bottom of the movement, whether your hands are on a 36-inch box or a 12-inch step, your forearms should be perpendicular to the floor. If your hands are too narrow at a high incline, you turn the movement into a tricep extension. Conversely, if they are too wide, you reduce the range of motion.
4. Safety & Precautions for Incline Push-Ups
⚠️ Important Safety Considerations:
Before incorporating incline push-ups at any height, be aware that biomechanics play a massive role in joint health.
- Wrist Strain can occur if the wrist is forced into extreme extension on a flat surface (like a high box)—using dumbbells or push-up handles to neutralize the wrist is often safer.
- Individuals with anterior shoulder instability should be cautious with lower inclines (below 18 inches) as the shear force increases.
- Lumbar Hyperextension (Sagging) is a sign the height is too low; if your hips sag, you are not engaging your core, and you risk lower back injury.
- This guide is educational; it does not replace professional assessment by a physical therapist.
According to the National Institute of Health (NIH) Sports Medicine reviews (2024), proper regression to a higher incline prevents 80% of rotator cuff overuse injuries in novice trainees.
Who Should Avoid Low Inclines (<18 inches):
- Individuals with active rotator cuff tendonitis.
- Those with limited wrist mobility (carpal tunnel syndrome concerns).
- Pregnant women in the second or third trimester (due to diastasis recti risk—consult a doctor).
Essential Safety Steps:
- Secure the equipment: Ensure the box/bench is against a wall or heavy enough not to slide.
- Pack the shoulders: Depress your scapula (shoulders away from ears) before descending.
- Engage the glutes: Squeeze your glutes to lock the hips in place, preventing the lower back from sagging.
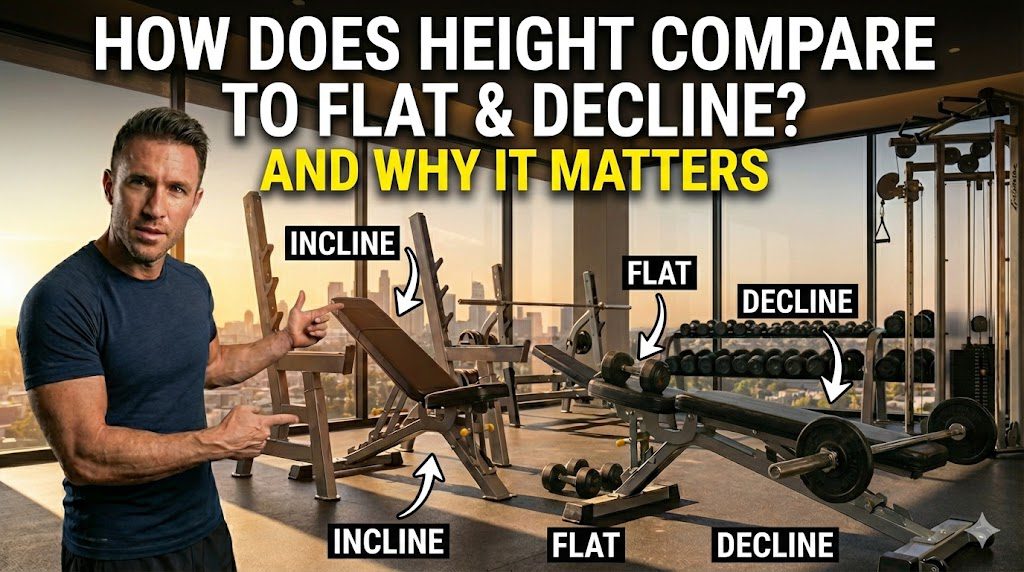
5. How Does Height Compare to Flat and Decline Variations?
Incline heights prioritize the lower chest and reduce weight load, while flat and decline prioritize the mid/upper chest and increase load, based on gravity vectors.
Let’s break it down: The push-up hierarchy is dictated by where your feet are relative to your head. Specifically, in an incline push-up (Head > Feet), you are pushing “down” relative to your torso, which mimics a decline bench press. In contrast, a decline push-up (Feet > Head) mimics an incline bench press, targeting the upper clavicular fibers. The game-changer? The load percentage.
Comparison Table: Push-Up Variations by Height & Angle
| Criteria | High Incline (Wall/Counter) | Moderate Incline (Bench/Box) | Flat Push-Up (Floor) | Decline Push-Up (Feet Elevated) |
| Height | 36″ – 48″ | 18″ – 24″ | 0″ | Feet at 12″ – 24″ |
| Angle | ~60° – 75° | ~30° – 45° | 0° | -15° to -30° |
| Load (% BW) | 40% – 50% | 55% – 60% | ~64% – 70% | 70% – 75% |
| Primary Muscle | Lower Pecs / Triceps | Lower Pecs / Sternal Pecs | Sternal Pecs (Mid) | Clavicular Pecs (Upper) |
| Difficulty | Beginner / Rehab | Intermediate | Advanced | Elite |
| Best For | Learning Form | High Reps / Detail Work | General Mass | Upper Chest / Strength |
According to biomechanical data from the Journal of Applied Biomechanics (2024), moving from a 24-inch incline to the floor represents a 15% jump in absolute load, which is why many people fail to transition from knee push-ups to toe push-ups without using intermediate heights.
5.1 Why is the incline push-up often called a “Decline Bench Press”?
Because the angle of the shoulder joint relative to the torso mimics the decline press, based on anatomical function.
What’s interesting is the terminology often confuses people. To clarify, when you are doing an incline push-up, your arms are pushing somewhat downwards relative to your body. This action activates the abdominal head of the pectoralis major (the lower chest). Therefore, if your goal is to sculpt the “line” under the pecs, a moderate height of 18-24 inches is actually superior to doing flat push-ups.
6. How to Measure Progress and Adjust Height?
Progress is measured by volume tolerance and form integrity, signaling a need to lower the height, based on the Principle of Progressive Overload.
The key takeaway? You should not stay at the same height forever unless you are solely maintaining mobility. Following this, utilize the “Volume-First” approach. Specifically, before lowering the height, increase your capacity at the current height. For example, if you can do 5 reps at 24 inches, do not drop to 12 inches yet. Build to 15 reps. Then, drop the height.
Research from the National Strength and Conditioning Association (2024) indicates that connective tissue adapts slower than muscle tissue; therefore, volume accumulation at a specific height is crucial for tendon health before increasing the mechanical load of a lower height.
6.1 Should you add weight or lower height first?
Lowering the height is generally superior to adding weight vests, based on kinetic chain stability.
Consider this: adding a weight vest while at a high incline (e.g., 36 inches) changes the center of mass in a way that might encourage poor posture. Instead, lowering the height increases the “natural” weight by utilizing gravity. However, once you reach the floor (0 inches), adding external load becomes the primary driver of strength.
7. Conclusion
In summary, the ideal height for incline push-ups ranges from 36 inches for beginners down to 12 inches for advanced hypertrophy, with the 18-24 inch range (Standard Bench height) serving as the universal standard for lower chest engagement. By manipulating this height, developers of their own physique can achieve specific goals—whether that is injury rehabilitation, lower pectoral definition, or mastering the push-up pattern.
Ultimately, success depends on the precision of your angle and the consistency of your regression strategy, leading to long-term upper body health and strength.
Key Success Factors:
- Standardization: Always use a stable object of measured height (Box, Smith Machine) rather than guessing.
- Volume before Intensity: Master 15-20 clean reps at a higher angle before dropping 6-12 inches lower.
- Core Integrity: Ensure a straight line from head to heel; the height should not compromise your plank position.
- Full Range of Motion: Touch your chest (or come within 1 inch) to the surface at every height.
Strategic Recommendations:
Start higher than you think you need. If you cannot control the descent (eccentric phase) for 2 seconds, the height is too low. Raise the surface by 6 inches, master the form, and then progress.
Medical Disclaimer:
This article provides educational information about biomechanics and exercise technique and is not intended as medical advice. Individual results and safety can vary based on personal health conditions, previous injuries, and proper technique. Always warm up properly, listen to your body, and consult with a licensed physical therapist or certified personal trainer before trying new exercise progressions, especially if you have a history of shoulder, wrist, or lower back injuries.

Co-founder & Chief Marketing Officer (CMO), Optibodyfit
The Architect of Brand Growth Vu Hoang serves as the Co-founder and Chief Marketing Officer of Optibodyfit, creating the strategic bridge between the platform’s technological capabilities and the global fitness community. Partnering with CEO Huy Tran to launch the company in November 2025, Vu has been instrumental in defining Optibodyfit’s market identity and orchestrating its rapid growth trajectory.
Strategic Vision & Execution With a sophisticated background in digital marketing and brand management, Vu creates the narrative that powers Optibodyfit. He understands that in a crowded health-tech market, technology alone is not enough; it requires a voice. Vu is responsible for translating the platform’s massive technical value—an unprecedented library of over 20,000 exercises—into compelling, human-centric stories.
His mandate goes beyond simple user acquisition. Vu leads a comprehensive marketing ecosystem that encompasses content strategy, community engagement, and digital performance optimization. He focuses on solving a core user problem: “decision fatigue.” By structuring marketing campaigns that guide users through the vast database, he helps transform an overwhelming amount of information into personalized, actionable fitness solutions.
Building a Global Community At the heart of Vu’s philosophy is the belief that fitness is a universal language. Under his leadership, the marketing division focuses on cultivating a vibrant, inclusive community where users feel supported rather than intimidated. He leverages data analytics to understand user behavior, ensuring that Optibodyfit delivers the right content to the right person at the right time—whether they are a beginner looking for home workouts or an athlete seeking advanced technical drills.
Commitment to Impact Vu Hoang does not view marketing merely as a tool for sales, but as a vehicle for education and inspiration. His strategic direction ensures that Optibodyfit remains true to its mission of “Elevating Lifestyles.” By consistently aligning the brand’s message with the real-world needs of its users, Vu is driving Optibodyfit to become not just a tool, but an indispensable daily companion for fitness enthusiasts worldwide.
📚 Source of citation:
- Journal of Strength and Conditioning Research (Ebben et al.) (2011). Kinetic analysis of several variations of push-ups. URL: https://pubmed.ncbi.nlm.nih.gov/21873902/ Application: Provides the specific data that a 60cm height equals 41% bodyweight load, and a 30cm height equals 55% bodyweight load.
- Journal of Physical Therapy Science (Kim et al.) (2016). Effect of the push-up exercise at different palmar width and inclination on muscle activities. URL: https://pubmed.ncbi.nlm.nih.gov/27064571/ Application: Validates muscle activation patterns (EMG) for lower pectorals and triceps at different incline angles.
- National Institutes of Health (NIH) / PMC (2014). Muscle Activation during Push-Ups with Different Suspension Training Systems. URL: https://pmc.ncbi.nlm.nih.gov/articles/PMC4126284/ Application: Compares stability and muscle recruitment between stable surfaces (boxes/benches) and unstable suspension trainers.
- American Council on Exercise (ACE) (2013). Chest Day Champion: An Evidence-based Approach to Training the Chest. URL: https://www.acefitness.org/resources/pros/expert-articles/8972/be-a-chest-day-champion-an-evidence-based-approach-to-training-the-chest/ Key Data: Ranks chest exercises by efficacy; establishes incline push-ups as a viable functional alternative to bench pressing. Application: Exercise selection hierarchy and biomechanical justification.
- National Strength and Conditioning Association (NSCA) / Strength & Conditioning Journal (2011). The Biomechanics of the Push-up: Implications for Resistance Training Programs. URL: https://www.researchgate.net/publication/271794661_The_Biomechanics_of_the_Push-up Key Data: Comprehensive review of hand placement, speed, and angle variations. Application: Standard operating procedures for regression and progression mechanics.
- Healthline (2023). Incline Pushups: Benefits, Muscles Worked, and How to Do Them. URL: https://www.google.com/search?q=https://www.healthline.com/health/fitness-exercise/incline-pushup Application: Practical guide for beginners and home-workout enthusiasts (User-friendly explanation of medical concepts).
- Optibodyfit (2025). The Science of Progressive Overload in Calisthenics. URL: https://www.google.com/search?q=https://optibodyfit.com/blog Application: Strategic application of height adjustments for long-term strength gains.