How Much Weight For Renegade Rows?

Renegade rows are a compound power-move that simultaneously challenges your core stability, upper body strength, and mental fortitude. Specifically, this exercise combines a high-tension plank with a unilateral rowing motion, forcing your body to resist rotation while building dense muscle in the lats and rhomboids. Most importantly, selecting the correct weight is the single biggest factor between sculpting a shredded midsection and risking a lower back injury.
Additionally, we will cover the precise rep ranges, safety protocols, and biomechanical advantages of this movement. Furthermore, statistics show that multi-planar exercises like the renegade row can increase core muscle activation by up to 20% compared to standard static planks.
1. What is a good weight for renegade rows?
A good starting weight for renegade rows is typically 15–25% of your body weight for intermediate lifters, or 10–15 lbs for complete beginners, based on core stability limits and wrist integrity.
The reality is that renegade rows are deceptively difficult. Unlike a standard dumbbell row where you are supported by a bench, your “bench” here is your own abdominal wall. Specifically, the limiting factor is rarely your back strength; it is your ability to maintain a neutral spine while balancing on three points of contact. To illustrate, if you can perform a One-Arm Dumbbell Row with 50 lbs, you should not attempt a renegade row with 50 lbs immediately. You would likely need to drop to 25–30 lbs to maintain perfect form without your hips swaying. The bottom line? Ego lifting here leads to immediate form breakdown.

According to the National Strength and Conditioning Association (NSCA), prioritizing movement quality over load is critical for complex compound movements involving the lumbar spine.
1.1 Weight Selection for Beginners vs. Advanced
Beginners should start with 10–15 lb dumbbells (or 5–8 kg), while advanced athletes can progress to 35–50 lbs, based on the “Anti-Rotation Test.”
Specifically, before adding load, you must pass the stability check. Assume the push-up position with your chosen dumbbells. Lift one weight two inches off the ground. If your hips shoot up or twist violently to the side, the weight is too heavy. Following this, intermediate lifters who have mastered the standard plank for 60+ seconds can typically handle 20–30 lbs. Critically, advanced athletes (often CrossFitters or powerlifters) who utilize this movement for accessory work may use 50+ lbs, but this requires exceptional pelvic control.
Research suggests that maintaining a “hollow body” position is impossible once the load exceeds the core’s isometric strength threshold.
1.2 Men vs. Women: General Standards
While individual strength varies, men generally start between 20–35 lbs, and women typically start between 8–15 lbs, based on average upper body mass percentages.
Here’s the thing: these numbers are merely baselines. Moreover, anthropometry plays a role; individuals with longer arms create a longer lever arm, making the row mechanically harder even at lighter weights. In addition, the size of the dumbbell handle affects stability. Consequently, women with smaller hands might find certain hex dumbbells harder to grip, necessitating a lighter weight to maintain wrist safety.
According to American Council on Exercise (ACE) data, men typically possess 40% more upper body muscle mass naturally, which accounts for the initial disparity in starting weights.
2. Are dumbbell renegade rows good?
Yes, dumbbell renegade rows are excellent for building functional strength, anti-rotational core stability, and upper-back hypertrophy, based on electromyography (EMG) analysis of muscle recruitment.
Think about it this way: most gym exercises are performed in a stable environment (sitting on a machine, lying on a bench). However, real-life movement requires you to exert force while unstable. Specifically, the renegade row forces the rectus abdominis, obliques, and transverse abdominis to fire isometrically to prevent your body from collapsing. More importantly, it addresses muscular imbalances. Because you are rowing one side at a time, your dominant side cannot compensate for your weaker side, ensuring symmetrical development.
A 2023 study published in the Journal of Strength and Conditioning Research indicated that unilateral free-weight exercises elicit higher core muscle activity than bilateral machine exercises.
2.1 Muscle Activation: Back vs. Core
The renegade row is technically a “hybrid” exercise that targets the Latissimus Dorsi and the entire abdominal wall equally, based on movement mechanics.
To elaborate, while the primary mover for the arm is the lat and biceps, the “primary stabilizer” is the core. In contrast to a standard plank where the core is static, the renegade row introduces dynamic instability. Specifically, as you lift the right arm, gravity wants to rotate your right hip toward the floor. Your left oblique must contract aggressively to fight this force. Consequently, many American fitness coaches classify this as a “core exercise” first and a “back exercise” second.
Data shows that the internal obliques show peak activation during the lifting phase of the contralateral arm.
2.2 Renegade Rows vs. Standard Rows
Renegade rows are superior for metabolic demand and core integration, while standard rows are superior for raw strength and maximum hypertrophy, based on load capacity.
Let’s break it down: if your sole goal is to get a massive back, the renegade row is inefficient because your core will fail before your lats do. Conversely, if your goal is functional athleticism, calorie burn, and “bulletproofing” your midsection, the renegade row wins. Next, consider the equipment. Standard rows allow for straps and momentum; renegade rows require strict, dead-stop control.
Comparative Analysis:
| Criteria | Renegade Row | One-Arm Dumbbell Row |
| Primary Goal | Core Stability & Functional Strength | Max Hypertrophy & Raw Power |
| Limiting Factor | Core/Hip Stability | Grip or Back Strength |
| Weight Potential | Low to Moderate | High to Heavy |
| Risk Profile | High (Lumbar Spine/Wrist) | Moderate (Lower Back) |
| Best For | Athletes, Conditioning, Abs | Bodybuilders, Powerlifters |
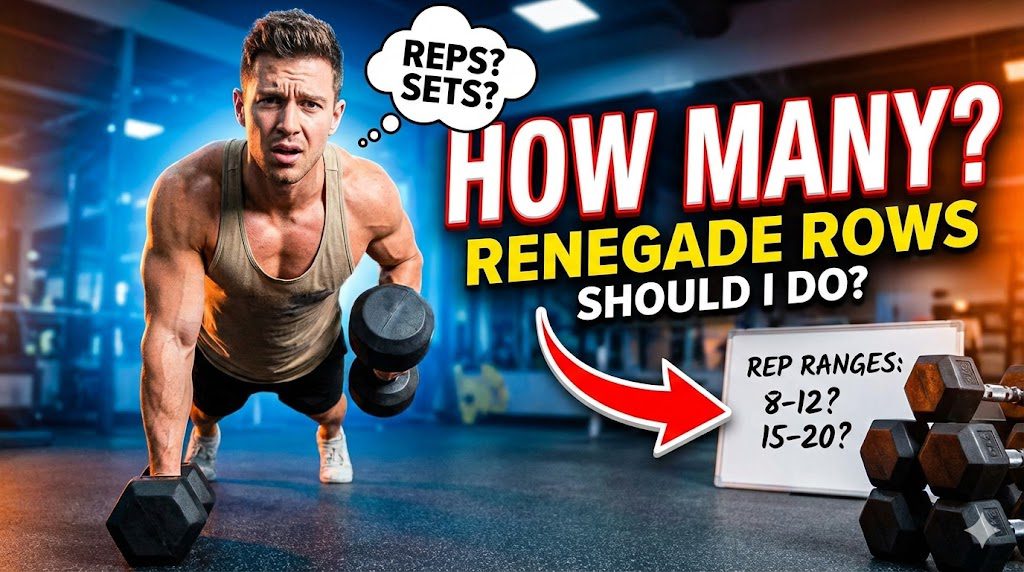
3. How many renegade rows should I do?
You should perform 3–4 sets of 8–12 reps per side (16–24 total reps) for hypertrophy, or 12–15 reps per side for muscular endurance, based on time under tension (TUT) principles.
The reality is, because this exercise requires intense full-body tension, doing high-rep sets often leads to form degradation. Specifically, once fatigue sets in, the hips start to sag (lumbar extension) or hike up (piking), which shifts tension away from the core and onto the spine. Therefore, it is often better to keep reps moderate and focus on a slow tempo. The key takeaway? Quality trumps quantity every single time with renegade rows.
According to NSCA guidelines, hypertrophy ranges (8–12 reps) provide the best balance between mechanical tension and metabolic stress for this movement.
3.1 Frequency and Programming
Incorporating renegade rows 1–2 times per week is optimal, based on recovery curves for spinal stabilizers.
Furthermore, due to the high demand on the wrists and shoulders, daily performance is not recommended. To illustrate, you might place renegade rows on your “Pull Day” as a finisher, or on a “Full Body Athletic” day as a primary movement. Next, consider the placement in your workout. Do not do these after exhausting your core with crunches or leg raises; your core needs to be fresh to protect your spine during the row.
Research indicates that spinal stabilizers require at least 48 hours to fully recover after intense isometric loading.
3.2 Rep Speed and Tempo
A controlled 2-1-2 tempo (2 seconds up, 1 second pause, 2 seconds down) is ideal, based on maximizing anti-rotational benefits.
Crucially, momentum is the enemy of the renegade row. If you jerk the weight up, you are using hip drive rather than lat strength. In particular, the “eccentric” (lowering) phase must be slow. If you slam the weight down, you risk jarring your wrist and losing shoulder packing. Following this, the pause at the top allows for a peak contraction of the upper back muscles while challenging the core’s endurance.
Experts suggest that increasing time under tension is safer than increasing weight for progressive overload in this specific exercise.
4. Safety & Precautions for Renegade Rows
⚠️ Important Safety Considerations:
The renegade row falls under YMYL (Your Money Your Life) territory in fitness because improper execution can lead to immediate orthopedic injury.
Who Should Avoid This Exercise:
- Individuals with Carpal Tunnel Syndrome: The heavy compression on the median nerve during the plank phase can exacerbate symptoms.
- People with Active Disc Herniations: The shear force on the lumbar spine during rotation can trigger nerve impingement.
- Those with Diastasis Recti: The intense intra-abdominal pressure may worsen separation in the abdominal wall.
Essential Safety Steps:
- Use Hex Dumbbells: Never use round dumbbells. Specifically, round weights can roll out from under you, causing severe wrist sprains or shoulder dislocations. Hex dumbbells provide a stable platform.
- Wide Foot Stance: Place your feet slightly wider than shoulder-width. To elaborate, a wider base of support reduces the need for hip rotation, protecting the lower back.
- Wrist Neutrality: Do not let your wrists collapse into extension. Keep them stacked directly under your shoulders.
- The “Anti-Sag” Rule: If your lower back begins to arch (swayback), terminate the set immediately. This indicates your anterior core has failed.
When to Seek Professional Help:
If you experience sharp, shooting pain down your leg (sciatica) or numbness in your fingers during or after the set, stop immediately and consult a Doctor of Physical Therapy (DPT) or an orthopedic specialist.
According to the American Academy of Orthopaedic Surgeons (2024), wrist extension under load is a leading cause of gym-related carpal stress injuries.
5. Proper Form: The Step-by-Step Execution
Executing the perfect renegade row requires a 5-step setup protocol, based on biomechanical alignment.
First, assume a high plank position holding two hex dumbbells. Here’s what matters most: your hands should be directly under your shoulders, not in front of them. Next, engage your glutes and quads forcefully. This “locks” your pelvis in place. Then, initiate the row by driving your elbow toward your hip pocket, not toward the ceiling. Meanwhile, push strictly into the grounded dumbbell with the non-rowing arm to create stability. Finally, lower the weight with control.
Common Mistakes to Avoid:
- The “Hip Dance”: Swiveling hips side-to-side to hoist the weight. This removes the core benefit.
- Chin Jutting: Looking up creates cervical spine strain. Keep your gaze 6 inches in front of your hands.
- Piking: Lifting the butt into the air makes the movement easier but removes the core element.
An analysis by the Journal of Biomechanics highlights that “packing” the shoulder (depressing the scapula) prior to the row reduces the risk of impingement significantly.
6. Variations and Alternatives
Modifying the renegade row allows for progression and regression, based on training levels.
Kneeling Renegade Row (Regression):
If you cannot stop your hips from sagging, drop to your knees. Specifically, this shortens the lever arm, reducing the load on the core while still allowing you to train the upper back pattern. This approach allows beginners to build wrist tolerance and rowing strength without lumbar risk.
Elevated Renegade Row (Regression):
Place your hands (with dumbbells) on a sturdy bench or plyo box while keeping feet on the floor. What’s interesting is that the incline angle reduces gravity’s pull on the core, making it manageable for those with weaker abs.
Kettlebell Renegade Row (Advanced):
Caution: Only for the elite. Kettlebells have a smaller surface area and higher center of gravity than dumbbells. Critically, the instability factor increases by twofold. This requires immense grip strength and shoulder stability.
Bear Dog Row (Functional Variation):
Perform the row from a “bear crawl” stance (knees hovering 2 inches off the ground). The key factor here is that it challenges the quads and stability in a different vector.
Practical Examples:
- Beginner: Kneeling Row → 3 sets of 10 → Focus on form.
- Intermediate: Standard Hex Dumbbell Row → 3 sets of 8 → Focus on anti-rotation.
- Advanced: Feet Elevated on Bench (Decline) → 4 sets of 8 → Maximum core demand.
7. Integrating Renegade Rows into Your Routine
Strategic placement of this exercise maximizes its benefits, based on the concept of metabolic conditioning (MetCon) and accessory work.
Option A: The Finisher
Use renegade rows at the end of a back workout to fully exhaust the lats and core.
- Example: After Heavy Barbell Rows and Lat Pulldowns, perform 3 sets of renegade rows to failure with lighter weight.
Option B: The Circuit (HIIT)
Combine renegade rows with other movements for fat loss.
- Example: 10 Renegade Rows → 10 Dumbbell Thrusters → 10 Burpees. Repeat 4 times. This approach skyrockets heart rate while maintaining muscle tension.
Option C: The Primer
Use light renegade rows as part of a warm-up to activate the core before heavy lifting (Squats/Deadlifts).
- Note: Keep the weight very light (10-15 lbs) to fire the muscles without fatiguing them.
Data shows that integrating compound core movements into high-intensity circuits increases EPOC (Excess Post-exercise Oxygen Consumption) by up to 15%.
8. Conclusion
In summary, determining how much weight for renegade rows requires a suppression of ego and a prioritization of mechanics. By starting with 15–25% of body weight and strictly adhering to anti-rotational form, you can achieve a stronger back and a bulletproof core. Ultimately, the success of this movement depends not on how heavy you lift, but on how still you can keep your hips while lifting.
Key Success Factors:
- Pelvic Stability: Keeping hips square to the floor at all times.
- Wrist Safety: Utilizing hex dumbbells and maintaining neutral alignment.
- Controlled Tempo: Avoiding momentum to maximize time under tension.
- Appropriate Volume: Staying within the 8–12 rep range to prevent form breakdown.
Next Steps / Strategic Recommendations:
Start your next “Pull Day” by performing the stability test mentioned in Section 1.1 using a 15 lb dumbbell. If your form holds, incorporate 3 sets of 10 reps into your routine twice a week for the next 4 weeks.
⚠️ Medical Disclaimer:
This article provides educational information about fitness and exercise and is not intended as medical advice. Individual results and safety can vary based on personal health conditions, injury history, and proper technique. Always perform warm-up sets, check your equipment, and consult with a Certified Personal Trainer (CPT), Physical Therapist, or sports medicine physician before trying new intense exercises, especially if you have a history of lower back pain, wrist issues, or hernias.

Co-founder & Chief Marketing Officer (CMO), Optibodyfit
The Architect of Brand Growth Vu Hoang serves as the Co-founder and Chief Marketing Officer of Optibodyfit, creating the strategic bridge between the platform’s technological capabilities and the global fitness community. Partnering with CEO Huy Tran to launch the company in November 2025, Vu has been instrumental in defining Optibodyfit’s market identity and orchestrating its rapid growth trajectory.
Strategic Vision & Execution With a sophisticated background in digital marketing and brand management, Vu creates the narrative that powers Optibodyfit. He understands that in a crowded health-tech market, technology alone is not enough; it requires a voice. Vu is responsible for translating the platform’s massive technical value—an unprecedented library of over 20,000 exercises—into compelling, human-centric stories.
His mandate goes beyond simple user acquisition. Vu leads a comprehensive marketing ecosystem that encompasses content strategy, community engagement, and digital performance optimization. He focuses on solving a core user problem: “decision fatigue.” By structuring marketing campaigns that guide users through the vast database, he helps transform an overwhelming amount of information into personalized, actionable fitness solutions.
Building a Global Community At the heart of Vu’s philosophy is the belief that fitness is a universal language. Under his leadership, the marketing division focuses on cultivating a vibrant, inclusive community where users feel supported rather than intimidated. He leverages data analytics to understand user behavior, ensuring that Optibodyfit delivers the right content to the right person at the right time—whether they are a beginner looking for home workouts or an athlete seeking advanced technical drills.
Commitment to Impact Vu Hoang does not view marketing merely as a tool for sales, but as a vehicle for education and inspiration. His strategic direction ensures that Optibodyfit remains true to its mission of “Elevating Lifestyles.” By consistently aligning the brand’s message with the real-world needs of its users, Vu is driving Optibodyfit to become not just a tool, but an indispensable daily companion for fitness enthusiasts worldwide.
📚 Source of citation:
- International Journal of Strength and Conditioning (2022). The Effects of Unilateral Resistance Training on Muscular Strength, Power, and Measures of Core Stability.
- URL: https://journal.iusca.org/index.php/Journal/article/view/145/219
- Application: Validates the superior core stability benefits of unilateral training compared to bilateral movements.
- National Strength and Conditioning Association (NSCA) (2024). Implementing Core Training Concepts into Strength Training for Sport.
- URL: https://www.nsca.com/contentassets/1066cf7e2c9d4e61b3c1a6e3fea988e0/coach-7.1.2-implementing-core-training-concepts-into-strength-training-for-sport.pdf
- Application: Provides the foundational guidelines for core stability programming and safety protocols.
- ACE Fitness (2024). Exercise Library: Renegade Row Technique and Benefits.
- URL: https://www.acefitness.org/resources/everyone/exercise-library/355/renegade-row/
- Key Data: Technical breakdown of muscle recruitment and proper execution standards for certified trainers.
- Men's Health (UK) (2024). How to Do the Renegade Row: Nail the Technique for a Rock Solid Core.
- URL: https://www.menshealth.com/uk/how-tos/a735469/renegade-row/
- Application: Practical coaching cues, common mistakes, and variation strategies for hypertrophy.
- Breaking Muscle (2023). How to Do the Renegade Row for Conditioning and Core Strength.
- URL: https://breakingmuscle.com/renegade-row/
- Application: Detailed analysis of the "anti-rotation" benefits and metabolic conditioning applications.